DIY: Festive Light Up Pumpkins
Halloween is a celebration that delights the hearts of the little ones and grown-ups alike. Stores are teeming with the most spooky decorations. Ranging from sneering red eyes and snapping jaws skeletons, to gravestones to put on front lawns and fake cobwebs that keep many people away.
Yet the real queen of the party, the one who thrones every year near the doors or windows of houses, it is always the pumpkin. It is the one that draws cries of joy to children they finally light the candle that will enlighten and highlight the shapes that have been carved with so much care.
But if smiling or grimacing pumpkins are often the classic way to go, why not think outside the box this year and transform your pumpkins into something different and more modern? Because they are not only used to brighten up the front doors on Halloween night! We can also use the pumpkins as decorative objects to beautifully adorn a dining table, a buffet, or why not, a kitchen island that will serve as a thematic and visual attraction for the occasion?
Here are three different ways to use pumpkins that will bring an autumnal feel to your home and add cheerful bright orange accents to your decor!
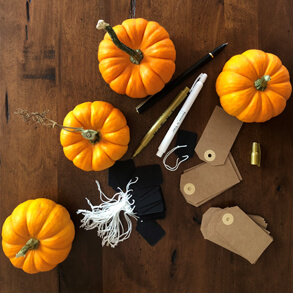
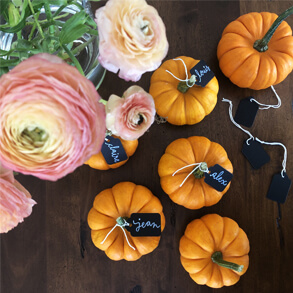
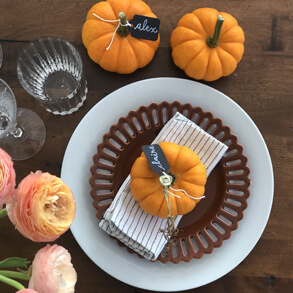
Mini Pumpkins as Place Cards
Mini pumpkins are perfect to create a festive atmosphere at your table! And to achieve this simply, it is very easy to transform them into place cards as follows:
- Obtain the required number of mini pumpkins for each of your guests.
- Buy black or beige drawstring labels on which you will write the names of your guests with a black pencil for beige labels, and white for black ones.
- Tie the labels on the tail of the mini-pumpkins and place them in front of the dinner plates or on a napkin carefully folded and placed in the center of each plate.
Glam and Chic!
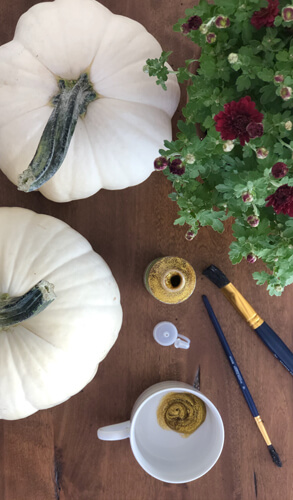
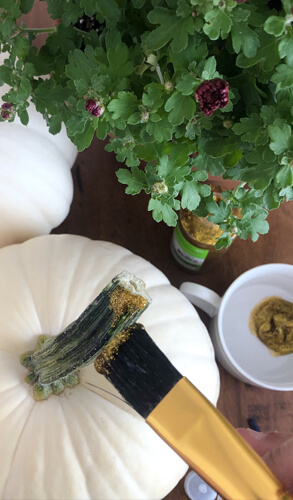
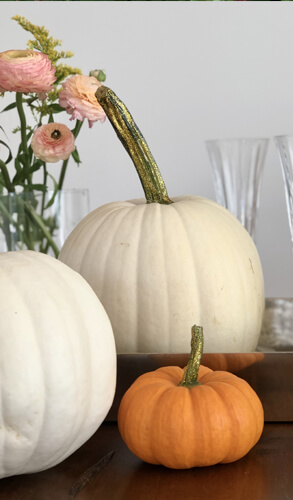
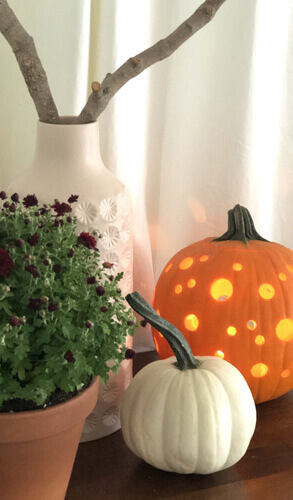
For a trendy and more modern look, a pristine white pumpkin with a sparkling tail will get you lots of compliments! There is no need for a knife or a drill here, and even less to empty your cucurbits. If you are failing to find a white pumpkin at the public market you only have to:
- Place your pumpkin on a painter’s canvas, large garbage bags, or newspaper. Make sure you have a work surface big enough to keep your floor clean! Or better yet, do the next step outside to take advantage of the nice and warm fall weather.
- Paint your pumpkin white. A white spray paint designed for general use will do the trick, plus it will take less time than with regular paint and a brush. Observe the drying period indicated by the manufacturer and spray an additional coat if necessary.
- Using a brush, apply a shimmering paint with gold-colored glitter. You can easily find this type of paint in a craft or artists’ supplies shop. However, it is also possible to leave the pumpkin tail as it is!
This pumpkin will be magnificent as a centerpiece, on your buffet, or your island! It can be beautiful alone, with candles, arranged with mini-pumpkins, or even as a duo with a pumpkin with holes!
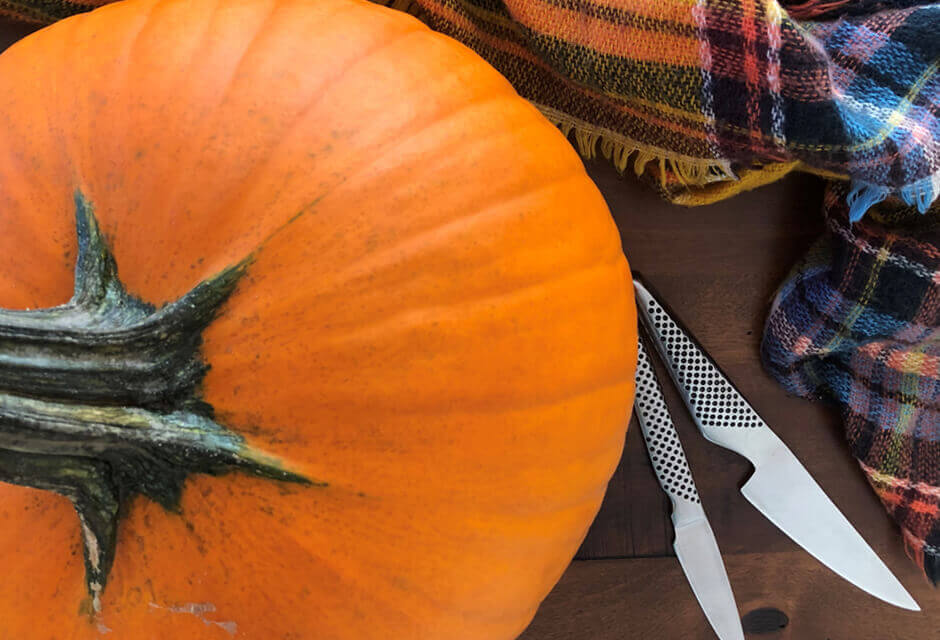
Pumpkins With Drilled Holes!
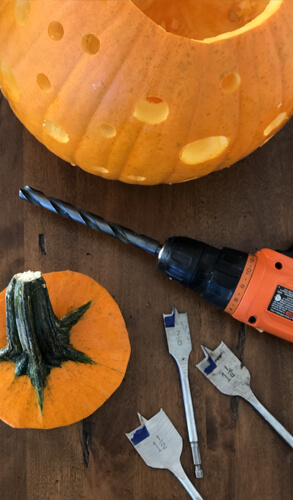
Carving a pumpkin is definitely fun and a much-anticipated family project for children. But there is a way to make a beautifully decorated pumpkin that takes less time and still looks great! Drilling many holes in a pumpkin is a less complex technique than carving it and only requires a power drill with round bits, and following the steps below:
- Lay your pumpkin flat on a work surface.
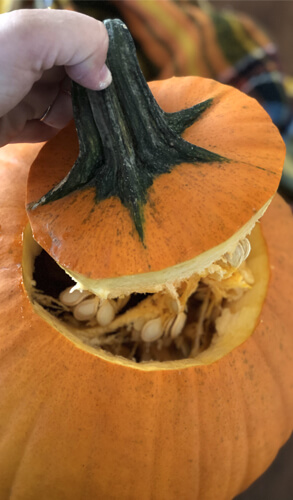
- Using a knife, cut a round shape from the top of the pumpkin and pull on the tail to remove the cap.
- With a spoon, scoop out the seeds and filaments from the pumpkin to expose the flesh. Don’t throw away the seeds! They are delicious when roasted in the oven.
- Using the drill, drill many places, changing the bits to get different sized holes.
- Place a candle in the center and light it up to admire your work!
For an even more stunning effect during your Halloween fest, why not go for a combination of the three ideas suggested above? Prepare your place cards, paint a few pumpkins, punch holes in others. Place the small ones on the plates and then arrange the others throughout the center of your table. Make sure to distribute the pumpkins with holes from one end of the table to the other. When the pumpkins are lighted, turn off the lights in the room and ask guests to sit down to eat. They will be dazzled!
Children and adults alike look forward to Halloween. Decorating your house with pumpkins that you have prepared with care for this holiday will certainly light up the little ones’ faces and make all the adults smile. Although the years go by and are not the same, a do-it-yourself or family decorating project gets the party going. Placing pumpkins here and there in your home will for sure create a festive and happy atmosphere.
All you have to do is put on your best costume, prepare dinner and sweets for your children, or the adults with sweet teeth, and celebrate with your loved ones in the warmth and comfort of your cozy, and scary, nest!
Psst!
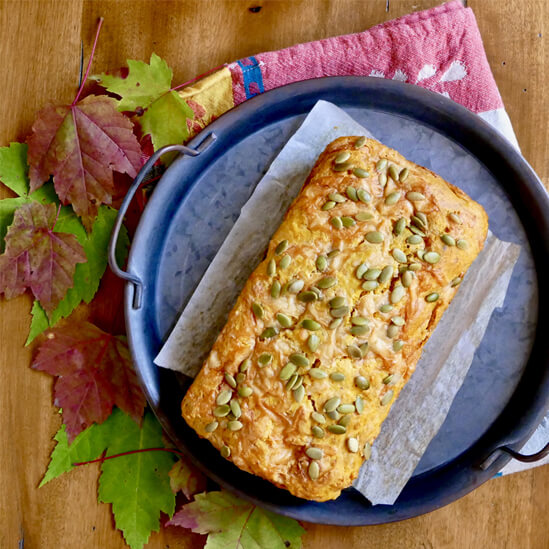
Once the party is over, do not throw your pumpkin in the trash! Pumpkin is also squash and it is very easy to turn it into a puree that will be used in many dishes. By the way, check out our succulent Roasted Pumpkin, Cheese, and Hazelnut Bread recipe. This mouth-watering recipe will certainly make you want to fill your home with the comforting smells of this delicious bread.
Did you know that the Halloween pumpkin tradition was born out of “Stingy Jack”, an old Irish legend?
Before immigrating to America, the Irish used turnips, beets, or potatoes in which they carved terrible faces. They would then use them as lanterns to frighten Stingy Jack, a man who had played the devil’s tricks and who, at his death, had been refused the gates of paradise and hell, and was therefore condemned to wander on earth for eternity. It was after they arrived in America that the Irish discovered the pumpkins whose larger size made them more attractive to scare evil spirits like that vile Jack!